mastodonで独自にテーマを設定する。
mastodonの鯖缶になると、独自性を持たせたくなり、その最初に思いつくのが自分自身の鯖のテーマだ。
デフォルトでmastodonは「ダーク」「コントラスト」「ライト」があるが、実はコマンドとCSSを駆使して自分自身のオリジナルテーマを作ることも可能である。今回は明るいオレンジ基調のテーマを作ることを主題としながら、テーマ追加、編集などの方法を書き殴っていく。
今回これを理解するにあたり、鴉河雛氏にお世話になった。ここで感謝を申し上げたい。
https://lm.korako.me/post/24028

テーマを追加する
そもそも、テーマが追加されているファイルはどこかと言うと、app/javascript/styles/の下であるのでまずは移動。
su - mastodon
cd live
cd app/javascript/styles
そこでls -lなどでファイルを見てみると、「mastodon-light」「contrast」とそれぞれディレクトリがあると思われる。
ここでダークテーマを追加したいのか、ライトテーマを追加したいのか分かれるのだが、ダークテーマを追加したい場合は「contrast」ディレクトリ、ライトテーマを追加したい場合は「mastodon-light」に移動する。今回は先程記述した通り、ライトテーマを主題とするので、「mastodon-light」のファイルで移動する。
そこでまたls -lをすると
variables.scss
diff.scss
2つのファイルがある。diff.scssは差分ファイルなので今回はパス。重要なのはvariables.scssだ。
variables.scssをcpコマンドなどでコピーする。今回はorange-variables.scssという名前にする。
cp variables.scss orange-variables.scss
これでvariables.scssと同じファイルが出来たと思う。不安だと思う人はls -lで確認。その後stylesファイルに戻る。
ここでまた任意のファイルを制作。今回はorange.scssって名前でファイルを作る。作るというか、viコマンドで新規に開く感じでOK。
中身は以下のようにする。
@import 'mastodon-light/orange-variables';
@import 'application';
@import 'mastodon-light/diff';
今回は先程作ったvariables.scssのコピーファイル名がorange-variables.scssにしているので、そこは臨機応変に変える事。あと.scssの部分はここでは省くこと。
これでファイルの明記は完了したので、次にこれをリストに追加する。
一度liveに戻り、config/themes.ymlを編集する。
default: styles/application.scss
contrast: styles/contrast.scss
mastodon-light: styles/mastodon-light.scss
orange: styles/orange.scss
デフォルトで3つあると思うので、その下に1行追記。
「『orange』はstyles/orange.scssのデータを参照しますよ」という意味を持つ。
保存して戻って次はconfig/locales/ja.ymlを編集する。
このファイルは、「orange」として指定したものを、日本語UIでどう表示させるか決めることができる。
ズラーーと長いファイルなので、/themeとかで検索かける。
  themes:
    contrast: Mastodon (ハイコントラスト)
    default: Mastodon (ダーク)
    mastodon-light: Mastodon (ライト)
    orange: Orange(ライト)
先程と同じで、3つデフォルトで入っているが、その下に追記する。これで、テーマを変更する際、プルダウンに表示されるのは「orange」ではなく「Orange(ライト)」にすることができる。
最後にこれらの編集を適用させるためにプリコンパイルする。
bundle exec rake assets:precompile RAILS_ENV=production
エラーが出たら明確に出てくるので該当する場所を確認する。
もし問題なく終わったらrootに戻ってsystemctl restart mastodon-*をする。
そして、プルダウンで選んで、ライトテーマになっていたら成功。
CSSでオリジナリティを出す。
mastodonのwebからいじれる。
「設定」⇒「管理」⇒「サーバー設定」⇒「外観」のカスタムCSSで作る。
これを作るにあたり、下記のサイトを参考にした。
https://7-nana.github.io/2018/10/20/Mastodon-Custom-CSS/
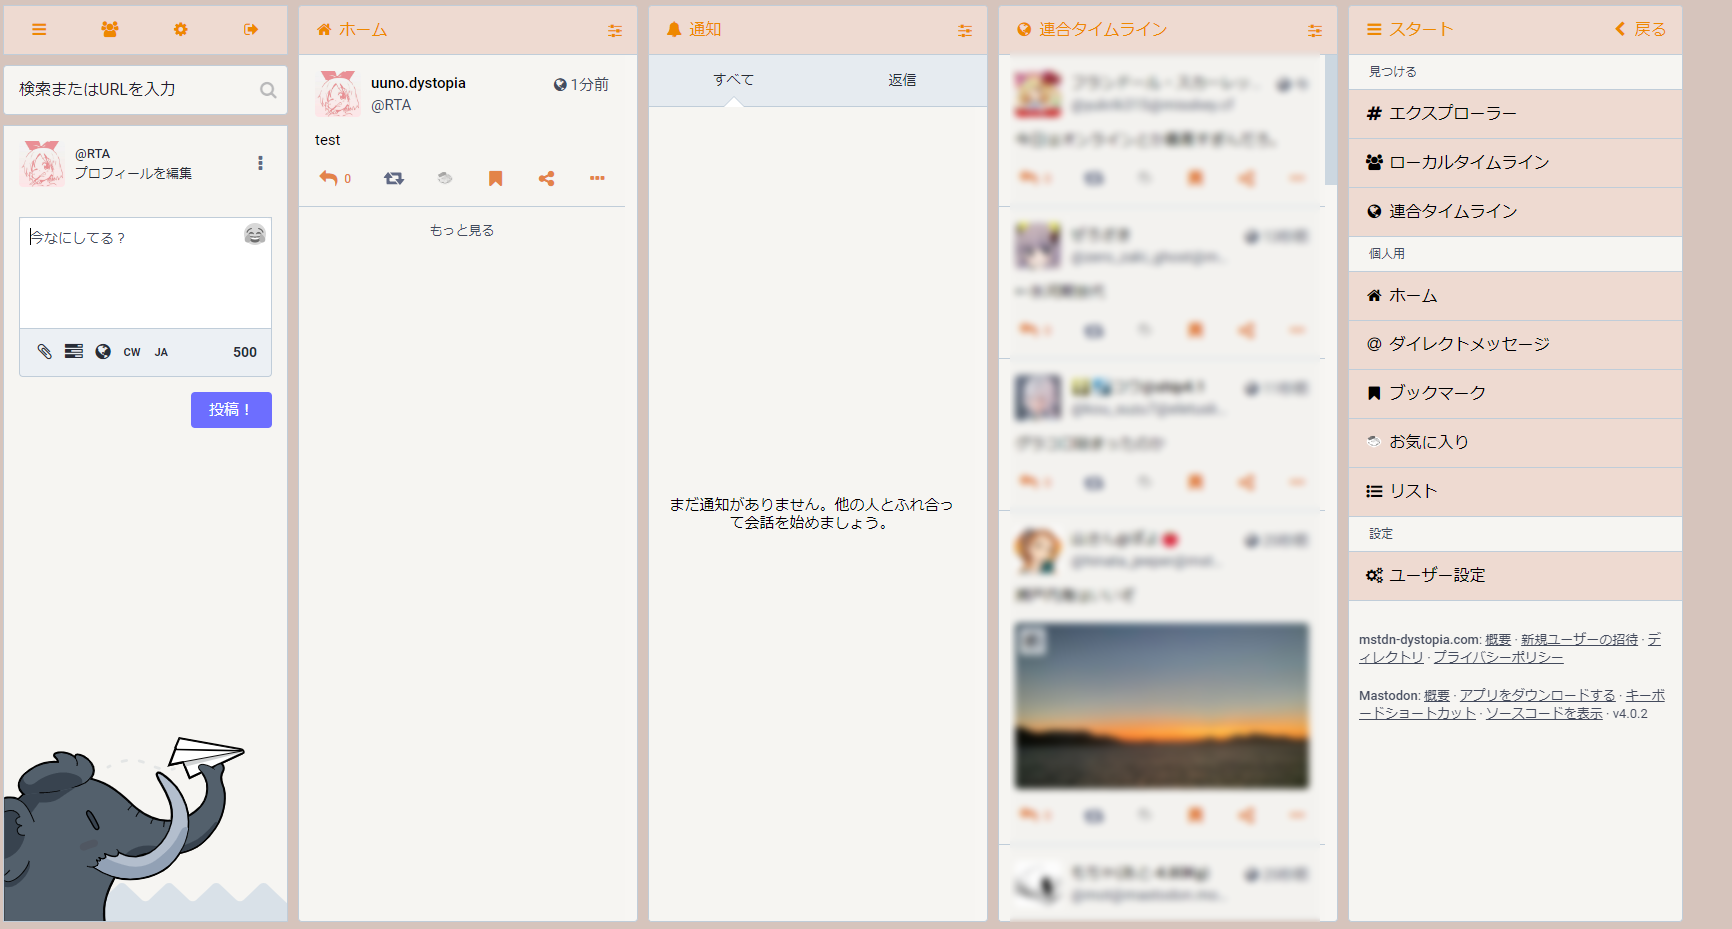
ここにも参考例となるCSS文を記載しておく。ちなみにこのままコピペすると、冒頭に貼ってある画像のようなURLになる。
/* 全体(一番下)とカラム設定の背景色を変える */
body.theme-orange,
body.theme-orange .column-header__collapsible-inner,
body.theme-orange .column-header__button.active,
body.theme-orange .ui {
   background-color: #d6c4bc;
}
/* カラムヘッダーの背景色を変える */
body.theme-orange a.column-link,
body.theme-orange .column-back-button,
body.theme-orange .column-header,
body.theme-orange .column-header__button,
body.theme-orange .column-header__back-button,
body.theme-orange .drawer__header,
body.theme-orange .list-editor h4,
body.theme-orange .public-layout .header,
body.theme-orange .search-results__header,
body.theme-orange .search-results__section h5,
body.theme-orange .tabs-bar {
   background-color: #eedad1;
}
/* カラムの背景色を変える */
body.theme-orange .activity-stream .entry,
body.theme-orange .account__header__fields dt,
body.theme-orange .box-widget,
body.theme-orange .card__bar,
body.theme-orange .card__img,
body.theme-orange .column-link__badge,
body.theme-orange .column-subheading,
body.theme-orange .column-inline-form,
body.theme-orange .column>.scrollable,
body.theme-orange .contact-widget,
body.theme-orange .detailed-status,
body.theme-orange .detailed-status__action-bar,
body.theme-orange .drawer__inner,
body.theme-orange .drawer__inner__mastodon,
body.theme-orange .empty-column-indicator,
body.theme-orange .error-column,
body.theme-orange .flex-spacer,
body.theme-orange .getting-started,
body.theme-orange .getting-started__wrapper,
body.theme-orange .hero-widget__text,
body.theme-orange .landing-page__information.contact-widget,
body.theme-orange .landing-page #mastodon-timeline,
body.theme-orange .landing-page__forms,
body.theme-orange .landing-page__information,
body.theme-orange .landing-page__call-to-action,
body.theme-orange .landing-page__information:last-child,
body.theme-orange .landing-page .separator-or span,
body.theme-orange .list-editor,
body.theme-orange .public-layout .public-account-header__bar:before,
body.theme-orange .public-layout .public-account-bio,
body.theme-orange .search__input,
body.theme-orange .status.status-direct,
body.theme-orange .status-card .status-card__content {
   background-color: #f6f5f2;
}
/* アカウントプロフィールのヘッダーと背景色を変える */
body.theme-orange .account__section-headline,
body.theme-orange .account__header .account__header__fields dt,
body.theme-orange .account__header .account__header__fields dd,
body.theme-orange .media-spoiler {
   background-color: #f6f5f2;
}
/* アカウントプロフィールのヘッダー画像に被せる色を変える */
body.theme-orange .account__header>div {
    background: rgba(246,245,242,1);
}
/* メインの文字色を変える */
body.theme-orange,
body.theme-orange a.drawer__tab,
body.theme-orange .account__header .account__header__fields dt,
body.theme-orange .account__section-headline a.active,
body.theme-orange .account__header__fields dt,
body.theme-orange .column-header>.column-header__back-button,
body.theme-orange .column-header__back-button,
body.theme-orange .column-back-button,
body.theme-orange .column-header__button,
body.theme-orange .column-header__button.active,
body.theme-orange .column-settings__section,
body.theme-orange .column-header__collapsible,
body.theme-orange .dropdown-menu__item a:active,
body.theme-orange .dropdown-menu__item a:focus,
body.theme-orange .dropdown-menu__item a:hover,
body.theme-orange .hero-widget__text,
body.theme-orange .landing-page li,
body.theme-orange .landing-page p,
body.theme-orange .notification__message,
body.theme-orange .public-layout .header .nav-link,
body.theme-orange .rich-formatting h3,
body.theme-orange .rich-formatting h4,
body.theme-orange .rich-formatting li,
body.theme-orange .rich-formatting p,
body.theme-orange .setting-meta__label,
body.theme-orange .setting-toggle__label,
body.theme-orange .simple_form p.hint.subtle-hint,
body.theme-orange .status-card:hover .status-card__content,
body.theme-orange .status-card:hover .status-card__title,
body.theme-orange .status-card:hover .status-card__description {
    color: #e80;
}
/* リンクの文字色を変える */
body.theme-orange .account__relationship .icon-button.active,
body.theme-orange .account__header .account__header__username,
body.theme-orange .account__header__fields a,
body.theme-orange .attachment-list__list a,
body.theme-orange .status__content a,
body.theme-orange .column-header.active .column-header__icon,
body.theme-orange .compose__action-bar-dropdown .icon-button.active,
body.theme-orange .getting-started__footer a,
body.theme-orange .notification__message .fa,
body.theme-orange .public-layout .public-account-bio .account__header__fields a,
body.theme-orange .reply-indicator__content a,
body.theme-orange .rich-formatting li a,
body.theme-orange .rich-formatting p a,
body.theme-orange .simple_form p.hint.subtle-hint a,
body.theme-orange .tabs-bar__link.active,
body.theme-orange .text-icon-button.active {
   color: #e38349;
}
/* トゥート下などのアクションバーの文字色を変える */
body.theme-orange .account__action-bar-dropdown .icon-button,
body.theme-orange .detailed-status__button .icon-button,
body.theme-orange .detailed-status__action-bar-dropdown .icon-button,
body.theme-orange .icon-button.disabled,
body.theme-orange .notification-favourite .status.status-direct .icon-button.disabled,
body.theme-orange .status__action-bar__counter .icon-button,
body.theme-orange .status__action-bar__counter__label,
body.theme-orange .status__action-bar .icon-button {
   color: #e38349;
}
あとはキャッシュの問題で反映されてないように思えるが、新規プライベートウィンドウなどでアクセスすれば反映されているはずだ。
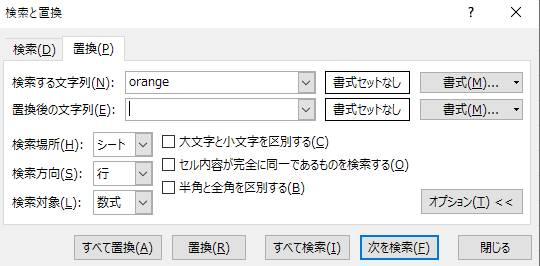
2つ目、3つ目と新しくテーマを追加し、CSSを書く場合は、これをコピペしてExcelとかに貼り付けて「Ctrl+H」で「検索と置換」を開き、「検索する文字列」に「orange」と入れて、「置換後の文字列」に新しく作った.scssファイルの名前を入力して「すべて置換」をクリックすれば一発で全部変更できる。
カラーコードなどはgoogleで「#ffffff」とか検索すると自由自在に見れるカラーコードが出てくるので使ってみてください。あと途中で3桁カラーコードやrgbaでの指定などがありますが、これは通常の6桁で指定したら反映されなかったので注意。
ダークテーマを追加したい場合は…
概ね説明したので、差分だけここでは記す。
まず、cd contrastで移動してvariables.scssをコピー。名前はblack-variables.scssとする。
戻ってcontrast.scssをコピー。名前はblack.scssにする。
cp contrast.scss black.scss
中身をいじる。
@import 'contrast/black-variables';
@import 'application';
@import 'contrast/diff';
あとはconfig/themes.ymlにテーマを追加し、翻訳を入れて、プリコンパイルして再起動。
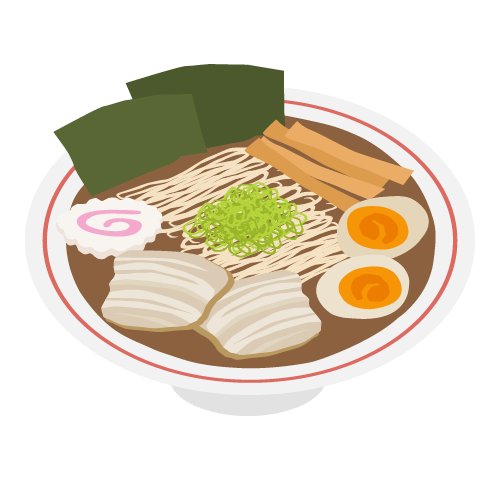
おまけ:お気に入りをラーメンにしたい
人間、生きていれば、お気に入りのボタンをラーメンに変えたくなる時もあります。
今回はこちらを用います。
https://gist.github.com/theoria24/8ac3ac0f8167b109eb0724c4563ddf6d
ラーメン画像はいらすと屋から拝借。幣鯖はオブジェクトストレージを繋げているので、そこに画像を入れておきます。
ちなみに私のこのリンクのままコピペしてもラーメンになりますが、私がサーバーをぶっ壊したり、万が一オブジェクトストレージが破損したりした場合は上手く反映されなくなるので、自分でDMとかで一回ラーメン画像を投稿して、画像のリンクをコピペした方が確実だと思います。
カスタムCSSに追記。
/* お気に入りをラーメン化 */
.fa-star::before {
    background: url(https://s3.ap-northeast-1.wasabisys.com/elastic-dystopia/media_attachments/files/109/402/183/558/522/705/original/83b354480922ca55.png);
    background-repeat: no-repeat;
    background-size: 100%;
    filter: grayscale(100%) opacity(50%);
    content: "\2003";
}
.active > .fa-star::before, .notification__favourite-icon-wrapper > .fa-star::before {
    filter: grayscale(0%) opacity(100%);
}
.column-link > .fa-star::before, .column-header > button > .fa-star::before, .notification__filter-bar > button > .fa-star::before {
    filter: grayscale(100%) brightness(125%) opacity(100%);
}
あとは保存してまたプライベートウィンドウとかで確認してみてください。

- uuno
- palworldのサーバー構築方法 2024年1月21日
- IFTTTを用いてRSSフィードをmastodonに投稿しよう 2024年1月14日
- DOP-C02(AWS Certified DevOps Engineer – Professional)を受けた 2023年12月11日
- 定期的にswap領域使用率を取得し、閾値を超えたら再起動させたい 2023年12月6日
- クイズ正解は1年後 -2023年編- 2023年12月5日
1件のピンバック
おひとりさまインスタンスの名称を「まぐろ丼-Magurodon-」にしました | wanderingdj's